When I first started out with taking photos with my DSLR, I wasn’t doing anything to edit or fine-tune my results. Usually, whatever I got out of my camera was what I would share.
Then, I decided to give Lightroom a shot, and I haven’t looked back since. The images I’ve been able to produce with some subtle tweaks on the raw files I get from my camera have been more than enough to convince me - you can read a little more on that in my previous post, Why You Should Be Post-Processing Your Photos.
My personal philosophy is to take a lighter touch to photo editing. I aim to improve my photos and make them more accurately represent what my eye saw through the viewfinder when I first took the shot - not to over-process and completely change everything about the original.
The goal here is to turn photos like this:
into something a little more like this:

The colours and details are enhanced, giving the photo more punch, while still leaving it within the realm of believability. With a slight crop and a couple of minor tweaks with some other image settings, and it’s almost an entirely new photo.
To give you an idea of the editing process from start to finish, I’m going to go through step-by-step with all of the adjustments I made to this photo.
Let’s start with the first step: cropping.
Note: This tutorial assumes that you already know how to set up a catalog, with some photos, inside Lightroom. I am using Lightroom Classic version 9.
Cropping
In the original, the top, horizon line of the falls is sagging down to the left. There’s also people visible along the top of the falls that don’t really add much to the photo.
So, time to fix both of those things!
- In Lightroom, with the photo you want to edit selected in the Library module, click the Develop module.
- In the Develop panel, underneath the photo’s Histogram, click Crop Overlay, or press R.
- To straighten any sagging or angled lines in your photo, click and drag the Angle adjustment slider until the line in the photo aligns with the lines displayed in the tool. You can also enter a specific value in the Angle field, or click the Angle field and press the up or down arrows on your keyboard to increase or decrease the angle adjustment, respectively:

Note: For my photo, this took an angle adjustment of 1.00.
4. To remove any unwanted areas from your photo, on the grid overlaying your displayed photo, click and drag on any of the displayed handles until the area you want removed is located outside the grid lines, and appears faded compared to the rest of your photo:

5. To confirm your adjustments, click Done.
Post-crop, my photo now looks like this:
The top line of the falls no longer drifts down to the left, and the people along the top are no longer visible.
Fixing Chromatic Aberration and Enabling a Lens Profile
This step might not always have a large, visible impact on your photos, but it is an important one, nonetheless.
Chromatic aberration is the presence of noticeable coloured fringes around objects, particularly in areas of high-contrast, in a photo. For a more detailed explanation, see Photography Life’s breakdown.
Enabling a lens profile simply removes any distortions specific to the lens you used to capture your photos. Some lenses produce more distortions than others, and there may be some situations where you want to fine-tune the distortion results, but in most cases, Lightroom handles this pretty well automatically.
Let’s enable both of these settings:
- In the Develop panel, locate the Lens Corrections section.
- Click the Remove Chromatic Aberration checkbox.
- Click the Enable Profile Corrections checkbox.
The Default setting should automatically select the correct lens and apply the right corrections to your photo:

Basic Image Adjustments
Now, let’s start making some of the basic adjustments to your photos that will really have a strong visual impact.
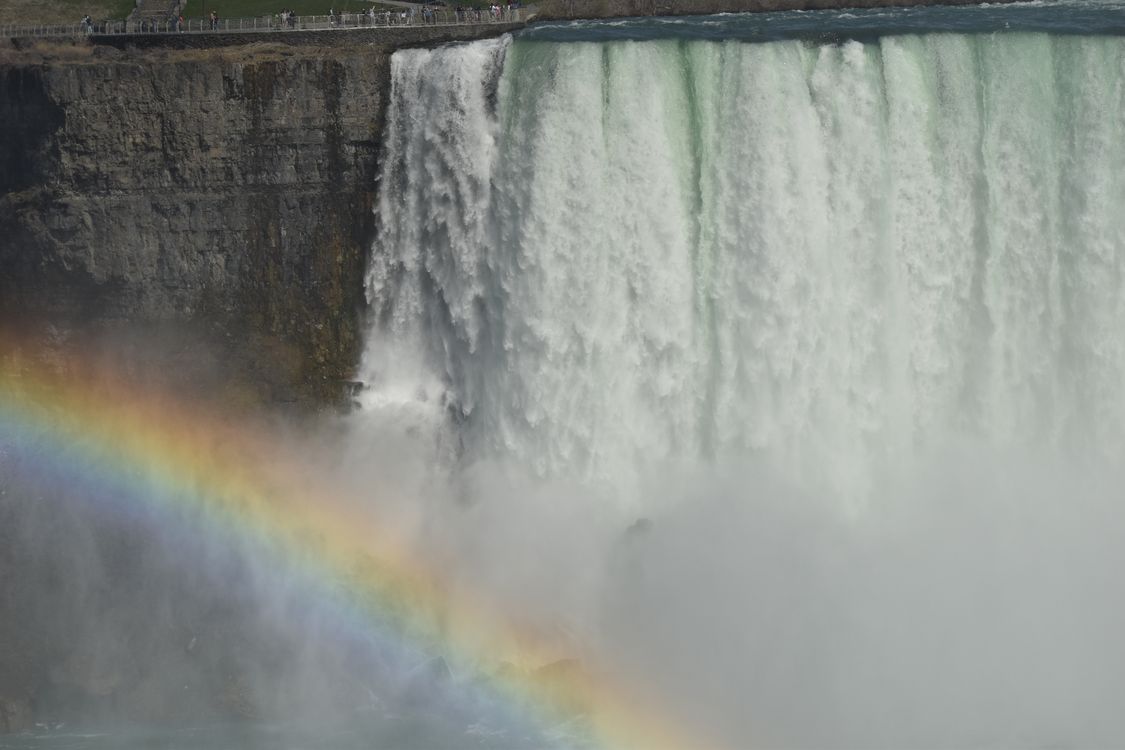
To determine what adjustments your photo might need, we first need to look at the histogram:

In a perfectly exposed and adjusted photo, the histogram should have a spread of values from the far left to the far right, indicating both strong black and dark values, as well as strong white and highlight values, with the presence of tones in between.
In my photo, I know I need to make some adjustments to the lighter and white values, and to a lesser extent, some adjustments to the black and darker values.
You can click and drag directly on the histogram to make adjustments, or use the sliders in the Develop panel. I’m going to start making my adjustments by adjusting the photo’s exposure, which will shift all of the colour information on the histogram to the right, increasing the white and highlight values and lightening the photo overall.
If your histogram has more intense white and highlight information, you’d want to decrease the photo’s exposure, and shift the values to the left.
- In the Develop panel, locate the Basic section.
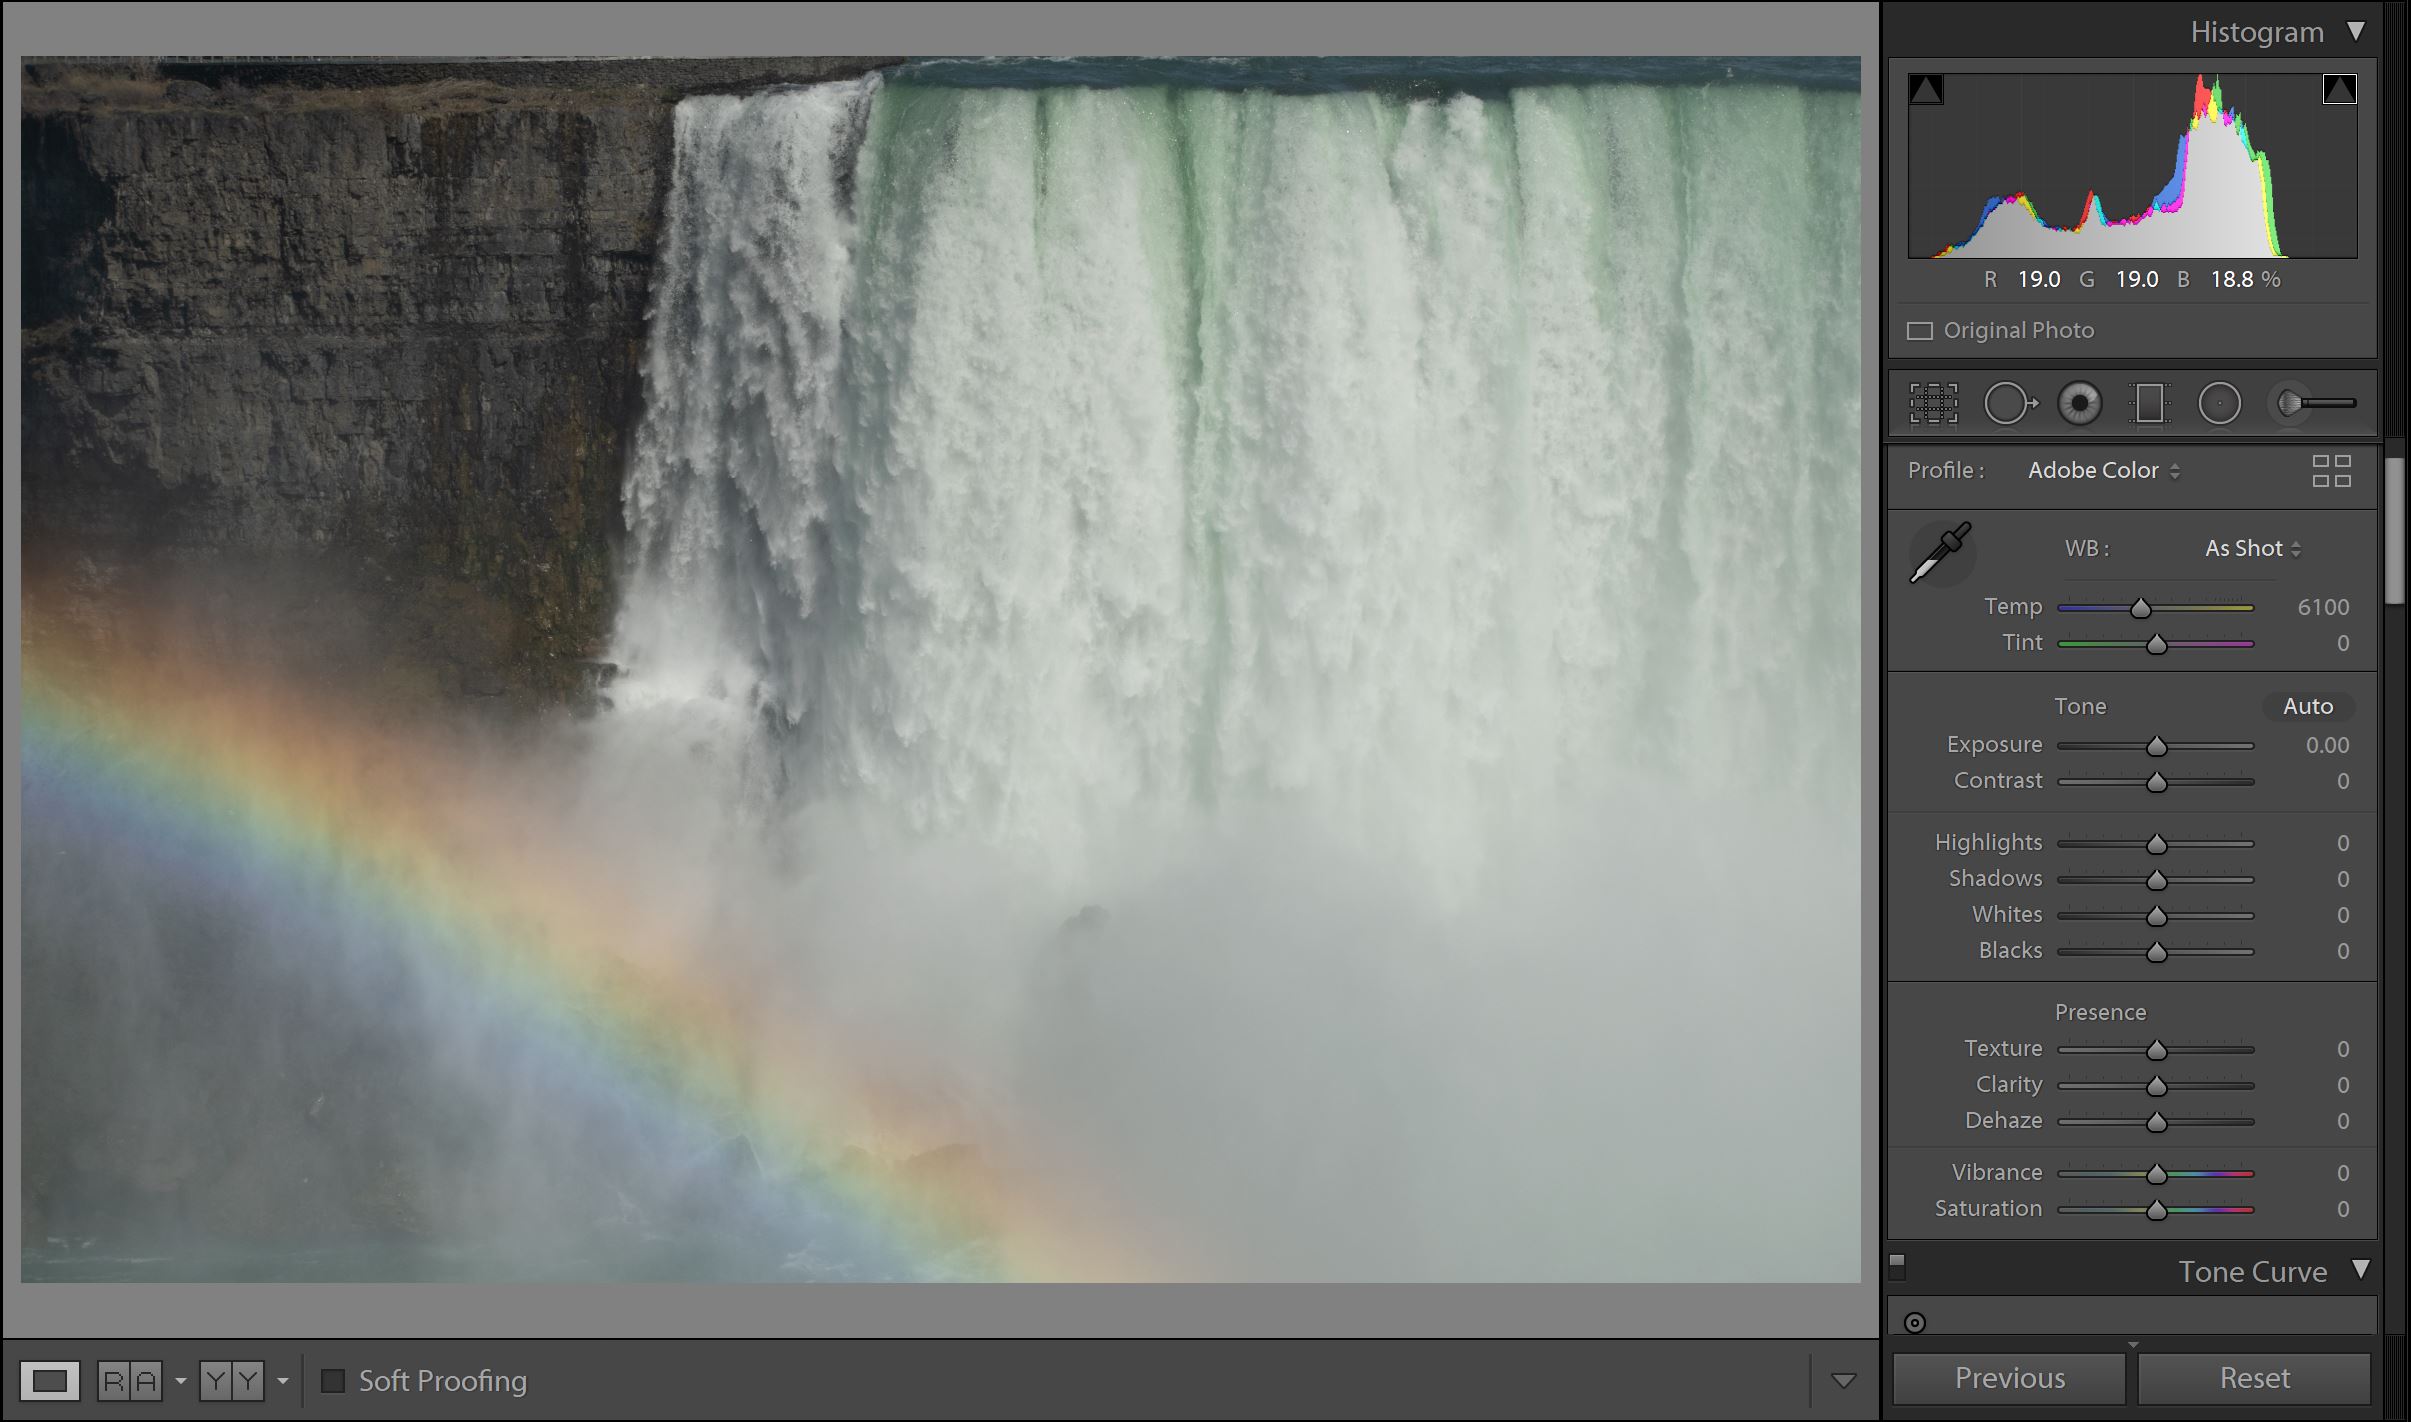
- Under Tone, click and drag the Exposure adjustment slider. To increase the photo’s exposure, drag the slider to the right. To decrease the exposure, drag the slider to the left. You can also enter a specific value in the Exposure field, or click the Exposure field and press the up or down arrows on your keyboard to increase or decrease the exposure adjustment, respectively.
Note: For my photo, this took a small adjustment of +0.23.
Now that I’ve adjusted the exposure, I want to cut down on some of the misty haze and softness in my colours that was introduced to the photo through all of the mist coming off of the waterfall:
4. Under Presence, click and drag the Dehaze adjustment slider. To increase the amount of dehazing, drag the slider to the right. To decrease the amount, drag the slider to the left. You can also enter a specific value in the Dehaze field, or click the Dehaze field and press the up or down arrows on your keyboard to increase or decrease the dehaze adjustment, respectively:
Note: For my photo, I settled on an adjustment of +59.
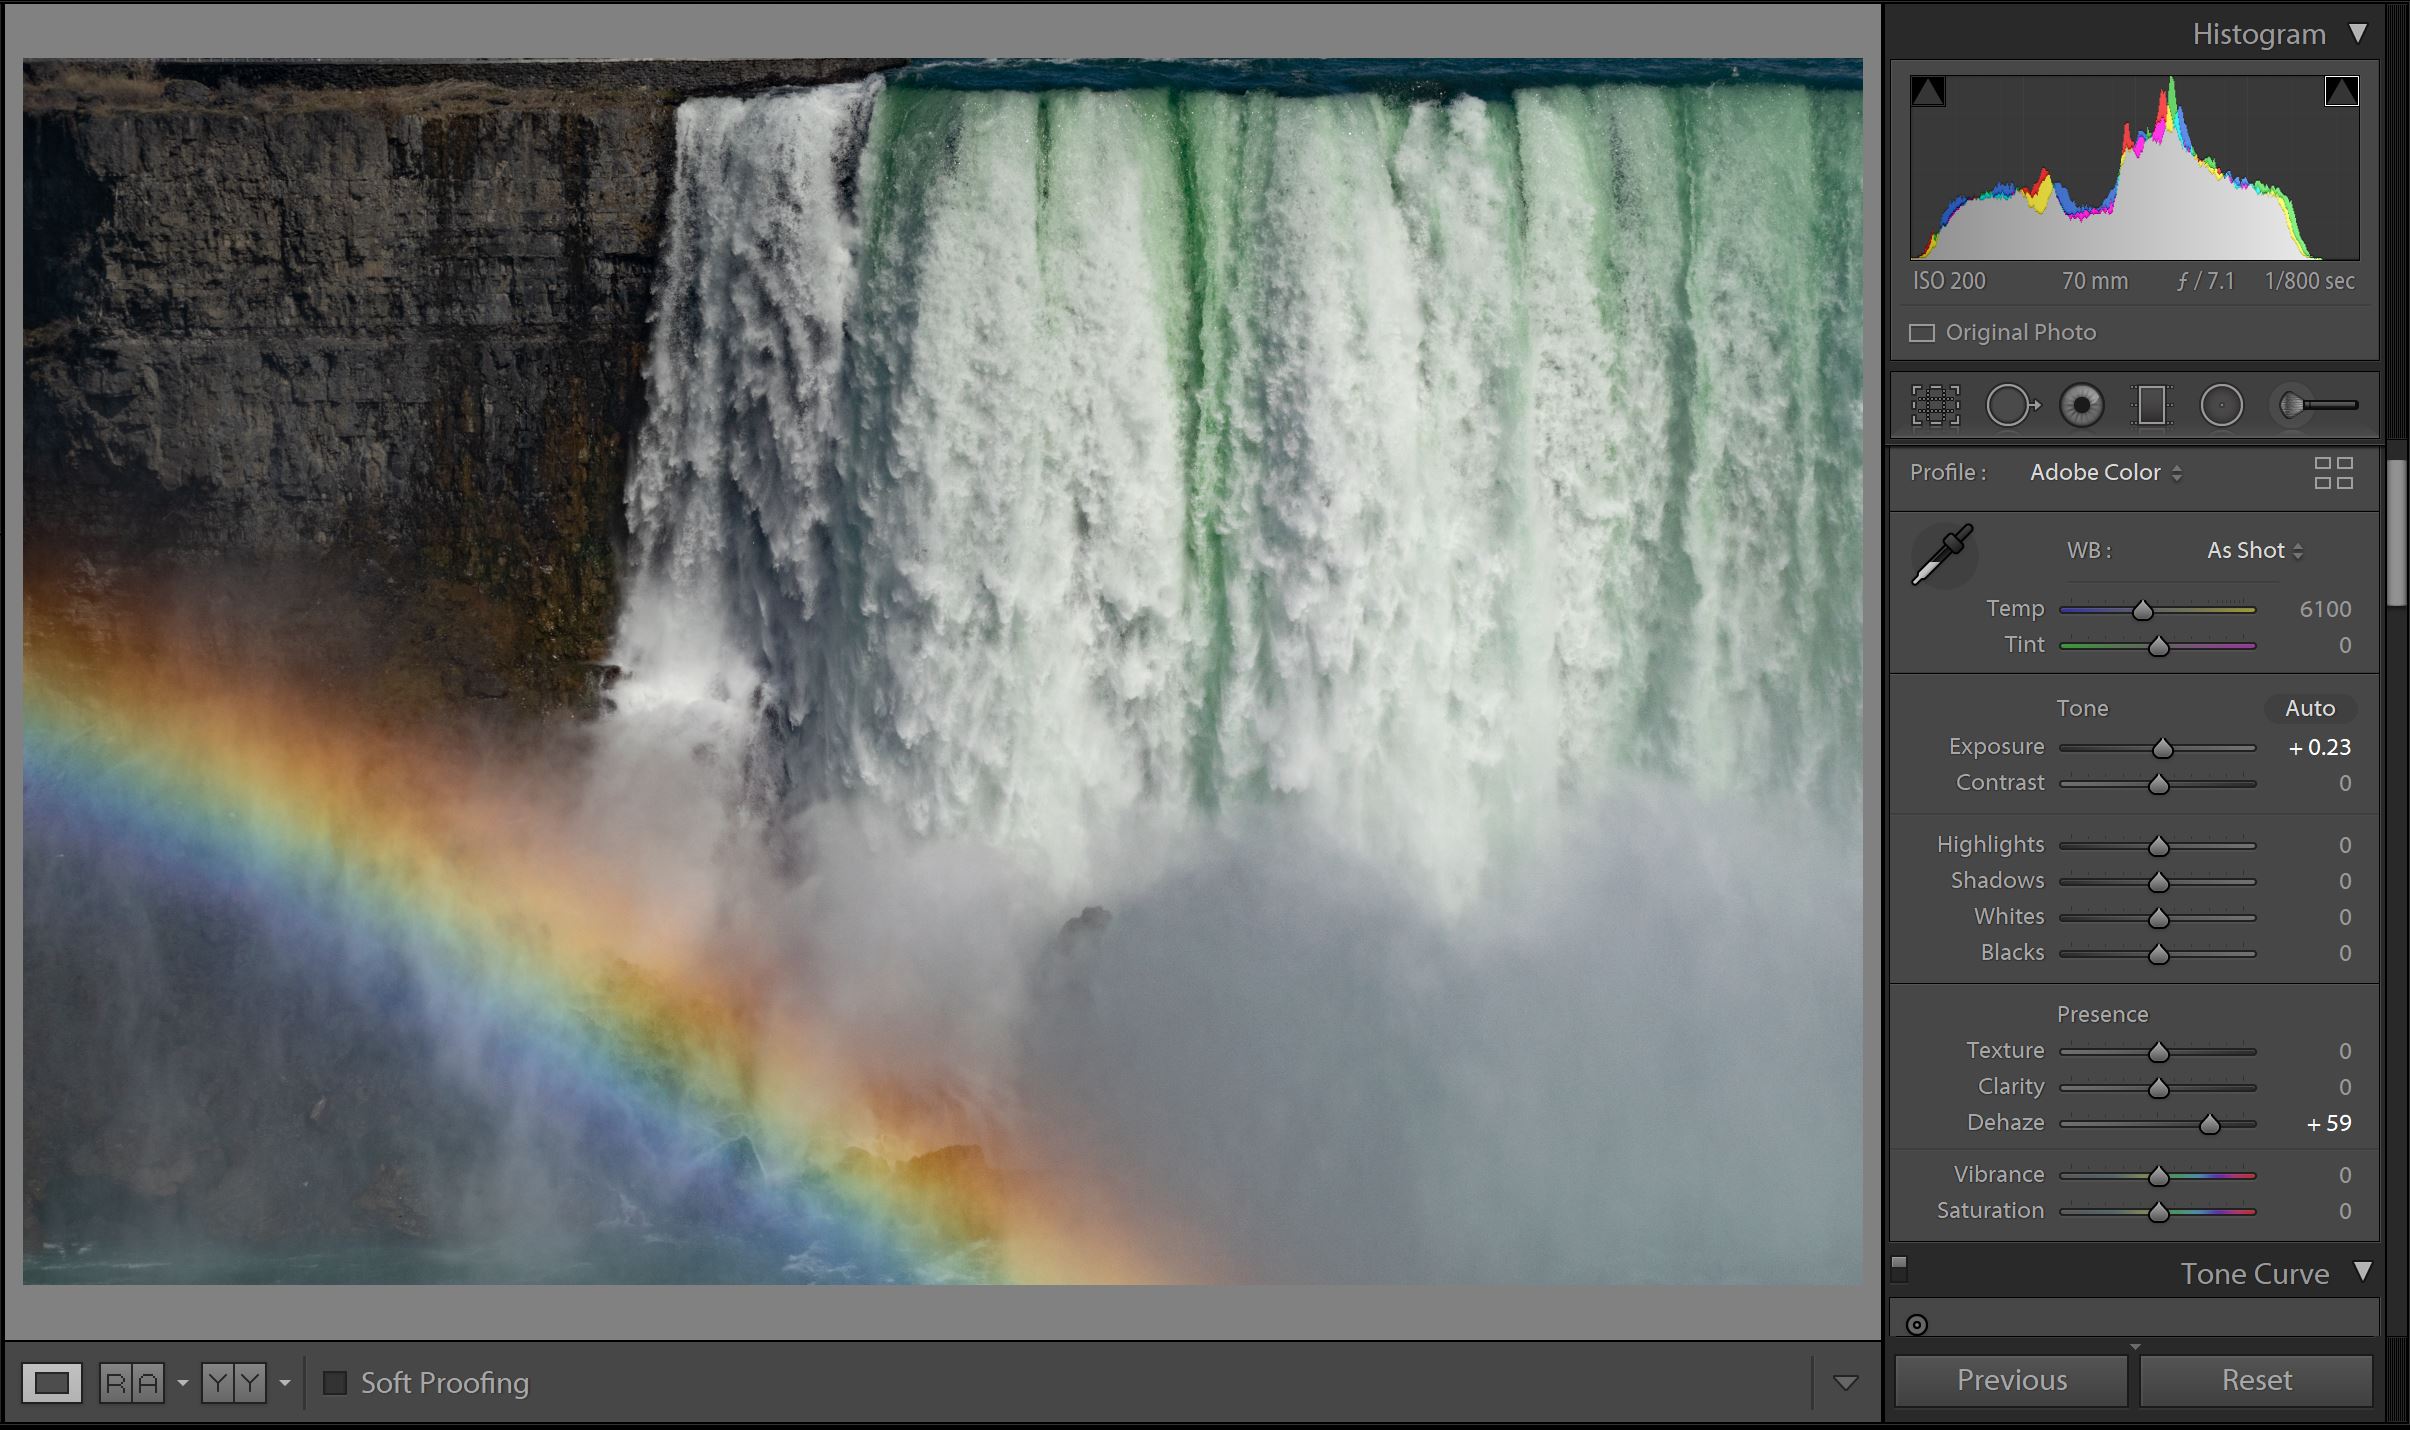
The Dehaze adjustment will also change the look of your histogram:

The darker and black values are now much closer to the left side of the histogram, which only leaves the white and highlight values left to adjust. When I know I’m planning to Dehaze a photo, I try to do it before making too many adjustments to the photo’s exposure, because of how Dehaze affects the histogram.
5. Under Tone, click and drag the Highlights adjustment slider. To increase the brightness of the photo’s highlights, drag the slider to the right. To decrease the brightness, drag the slider to the left. You can also enter a specific value in the Highlights field, or click the Highlights field and press the up or down arrows on your keyboard to increase or decrease the dehaze adjustment, respectively.
6. Repeat Step 5, using the Whites adjustment slider.
To keep the white and highlight adjustments feeling balanced with the rest of the photo, I made some small downward adjustments to my Blacks and Shadows, again, making adjustments using the sliders:
The histogram looks much more balanced, and now the photo looks much better!
To finish off the basic adjustments, and add a bit more of a balanced boost of colour to the photo:
7. Under Presence, click and drag the Vibrance adjustment slider. To increase the intensity of the more natural toned colors in your photo, drag the slider to the right. To decrease the intensity, drag the slider to the left. You can also enter a specific value in the Vibrance field, or click the Vibrance field and press the up or down arrows on your keyboard to increase or decrease the vibrance adjustment, respectively.
I tend to experiment more with the Vibrance slider before I attempt to do anything with Saturation. The Saturation adjustment can easily take very bright colours, such as reds and yellows, and make them oversaturated long before you see the adjustment you want in your more neutral, brown, grown, and blue tones.
Since I want to avoid oversaturating the rainbow in my photo, I only adjusted the vibrance, leaving us with this:

Sharpening and Reducing Noise
Finally, just to clean up the photo a bit, I’m going to do some sharpening and noise reduction adjustments.
Since there aren’t many fine details in my waterfall photo, I’m not going to go in-depth with a lot of the sharpening adjustments. The photo also isn’t very noisy, so there’s not too much to do here. I will add some sharpening, and add a bit of noise reduction just to cut down on any potential luminance noise. For a more in-depth explanation on noise in digital photography, check out Pixels and Wanderlust’s explanation.
I will cover more in-depth sharpening and noise reduction tips in another tutorial, for a photo that requires more obvious, intensive adjustments.
- In the Develop panel, locate the Detail section.
- Under Sharpening, click and drag the Amount adjustment slider. To increase the amount of sharpening of small details in your photo, drag the slider to the right. To decrease the sharpening amount, drag the slider to the left. You can also enter a specific value in the Amount field, or click the Amount field and press the up or down arrows on your keyboard to increase or decrease the sharpening adjustment, respectively.
- Under Noise Reduction, click and drag the Luminance adjustment slider. To increase the luminance noise reduction in your photo, drag the slider to the right. To decrease the noise reduction, drag the slider to the left. You can also enter a specific value in the Luminance field, or click the Luminance field and press the up or down arrows on your keyboard to increase or decrease the sharpening adjustment, respectively.
Be careful with relying too much on post-processing noise reduction - there is only so much that can be done to reduce noise in a photo before detail is lost, and everything in your photo starts to look like shapeless blobs of colour.
That being said, now that all of the adjustments are done, we can compare the final product to the original:

What a difference!
Is there something you want to learn how to do in Lightroom? Do you want to see a walkthrough of editing for a specific photo? Did you find this tutorial useful? Leave a comment below!